


 18 / 46

20
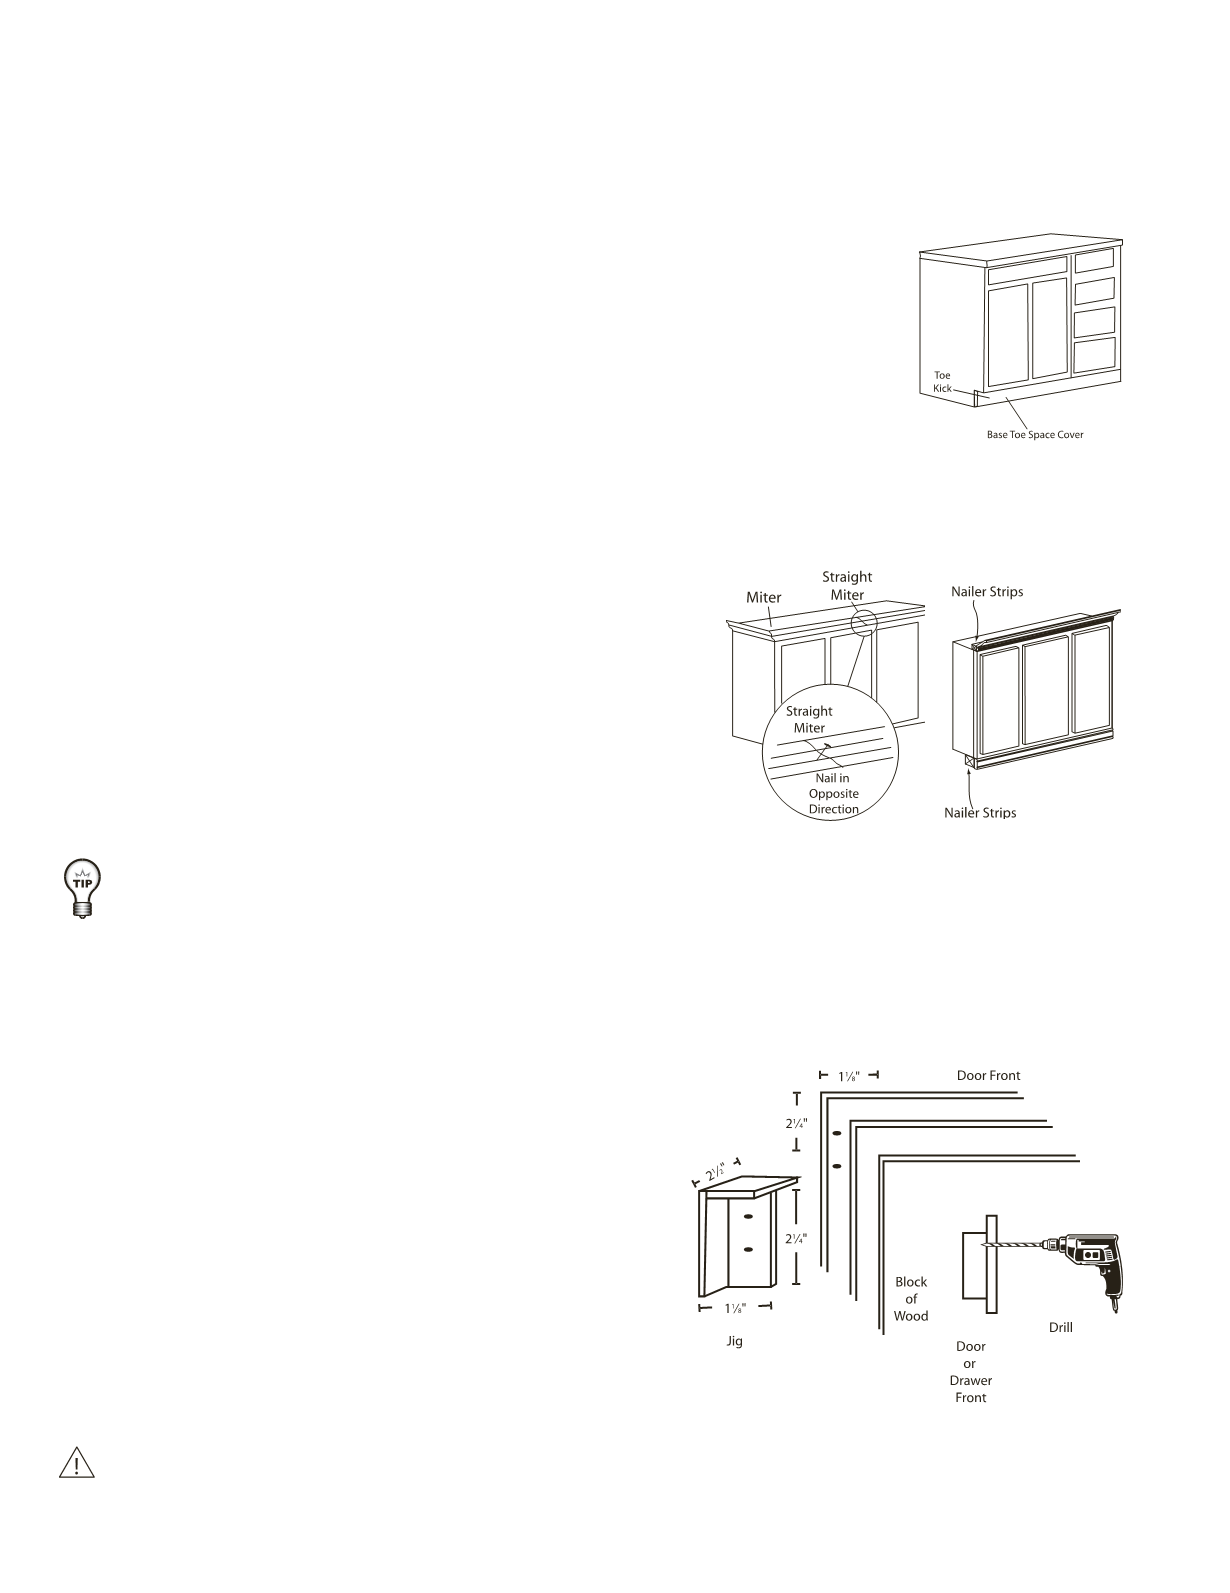
IX. BASE TOE SPACE COVERS
1. Toe kicks create a recess for the user’s feet while standing in front of a cabinet. It also provides a surface to
receive the floor covering base trim and is sometimes used to house under-cabinet heating vents. Lighting
can also be installed in this recess to create a floating effect or serve as an excellent night-light.
2. Wellborn Cabinet’s standard toe kick comes unfinished and sits back 3⅜” from the
face frame. For a finished look, it is necessary to cover this area using a Base Toe
Space Cover in black or matching finish.
3. Base Toe Space Covers come in 8-foot lengths to be trimmed as necessary. Nail
the toe space in place and use a touch up kit to conceal the nail holes.
4. To cover the edge of the Base Toe Spaces at the end of a row of cabinets, either
apply a matching touch up kit or a small piece of BEM or C3/4 molding to the edge.
Touch up kits are available in colors that complement any of Wellborn Cabinet’s
finishes.
X. MOULDING
1. Moulding is first cut to fit using a miter box and saw.
2. When one piece will fit up to another on a straight run of
cabinets, they should be spliced together as a straight miter.
3. Sometimes nailer strips are needed to apply certain moulding
on Full Overlay door styles. These nailer strips should be
applied to each cabinet before installation. Nailer strips vary
in thickness from ½”-1½” and are usually 1½” wide.
4. Moulding is applied with finishing nails, and it is best to use a
nail set to recess all of the finishing nails.
5. Fill in the recessed nail hole with a matching putty stick.
DRILL A PILOT HOLE IN THE MOULDING USING A FINISH NAIL AS A DRILL BIT OR THE SAME SIZE
REGULAR DRILL BIT TO AVOID SPLITTING MOULDING.
XI. DECORATIVE HARDWARE
Decorative hardware can be installed with the aid of a template or jig. Some companies have jigs for their decorative
hardware or you can make one.
1. Verify the exact location of all hardware before you begin
drilling holes.
2. Be sure all door and drawer fronts are adjusted prior to drilling
for decorative hardware. Please see door and drawer front
adjustment instructions.
3. Mark each hardware screw using the jig.
4. Drill the hole from the face side using a block of wood held
tightly to the back of the door or drawer while drilling. This
will minimize blowout in the wood on the backside of the
door or drawer.
5. Drill holes square and perpendicular to the surface to assure
screws align with the hardware holes when attaching the
hardware.
COUNTERSINK ALL SCREWS FOR DECORATIVE HARDWARE TO PREVENT SCRATCHING THE CABINET FACE
FRAME.