


 21 / 46

23
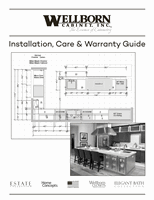
B. Vertical Panel Hardware
Before beginning, it is important to consider the location of
any doors, drawers or accessory items that will be installed
later.
1. Install the Panel Hanger at the top-back corner of the
Vertical Panel using 2 Euro Screws.
See Figure 4, Detail A.
2. Install Connecting Bolts into the Vertical Panel at the desired
location of the Fixed Shelves.
See Figure 4, Detail B.
3. If two Fixed Shelves will be installed adjacent to each
other, utilize the Push-thru Connecting Bolts to
facilitate the installation.
See Figure 4, Detail C.
Consider which Fixed Shelf will be installed first and
install the Push-thru Connecting Bolt from the
opposite side.
4. Place the opposing Vertical Panel next to the first
Vertical Panel as a visual aid and install Connecting
Bolts adjacent to those in the first Vertical Panel.
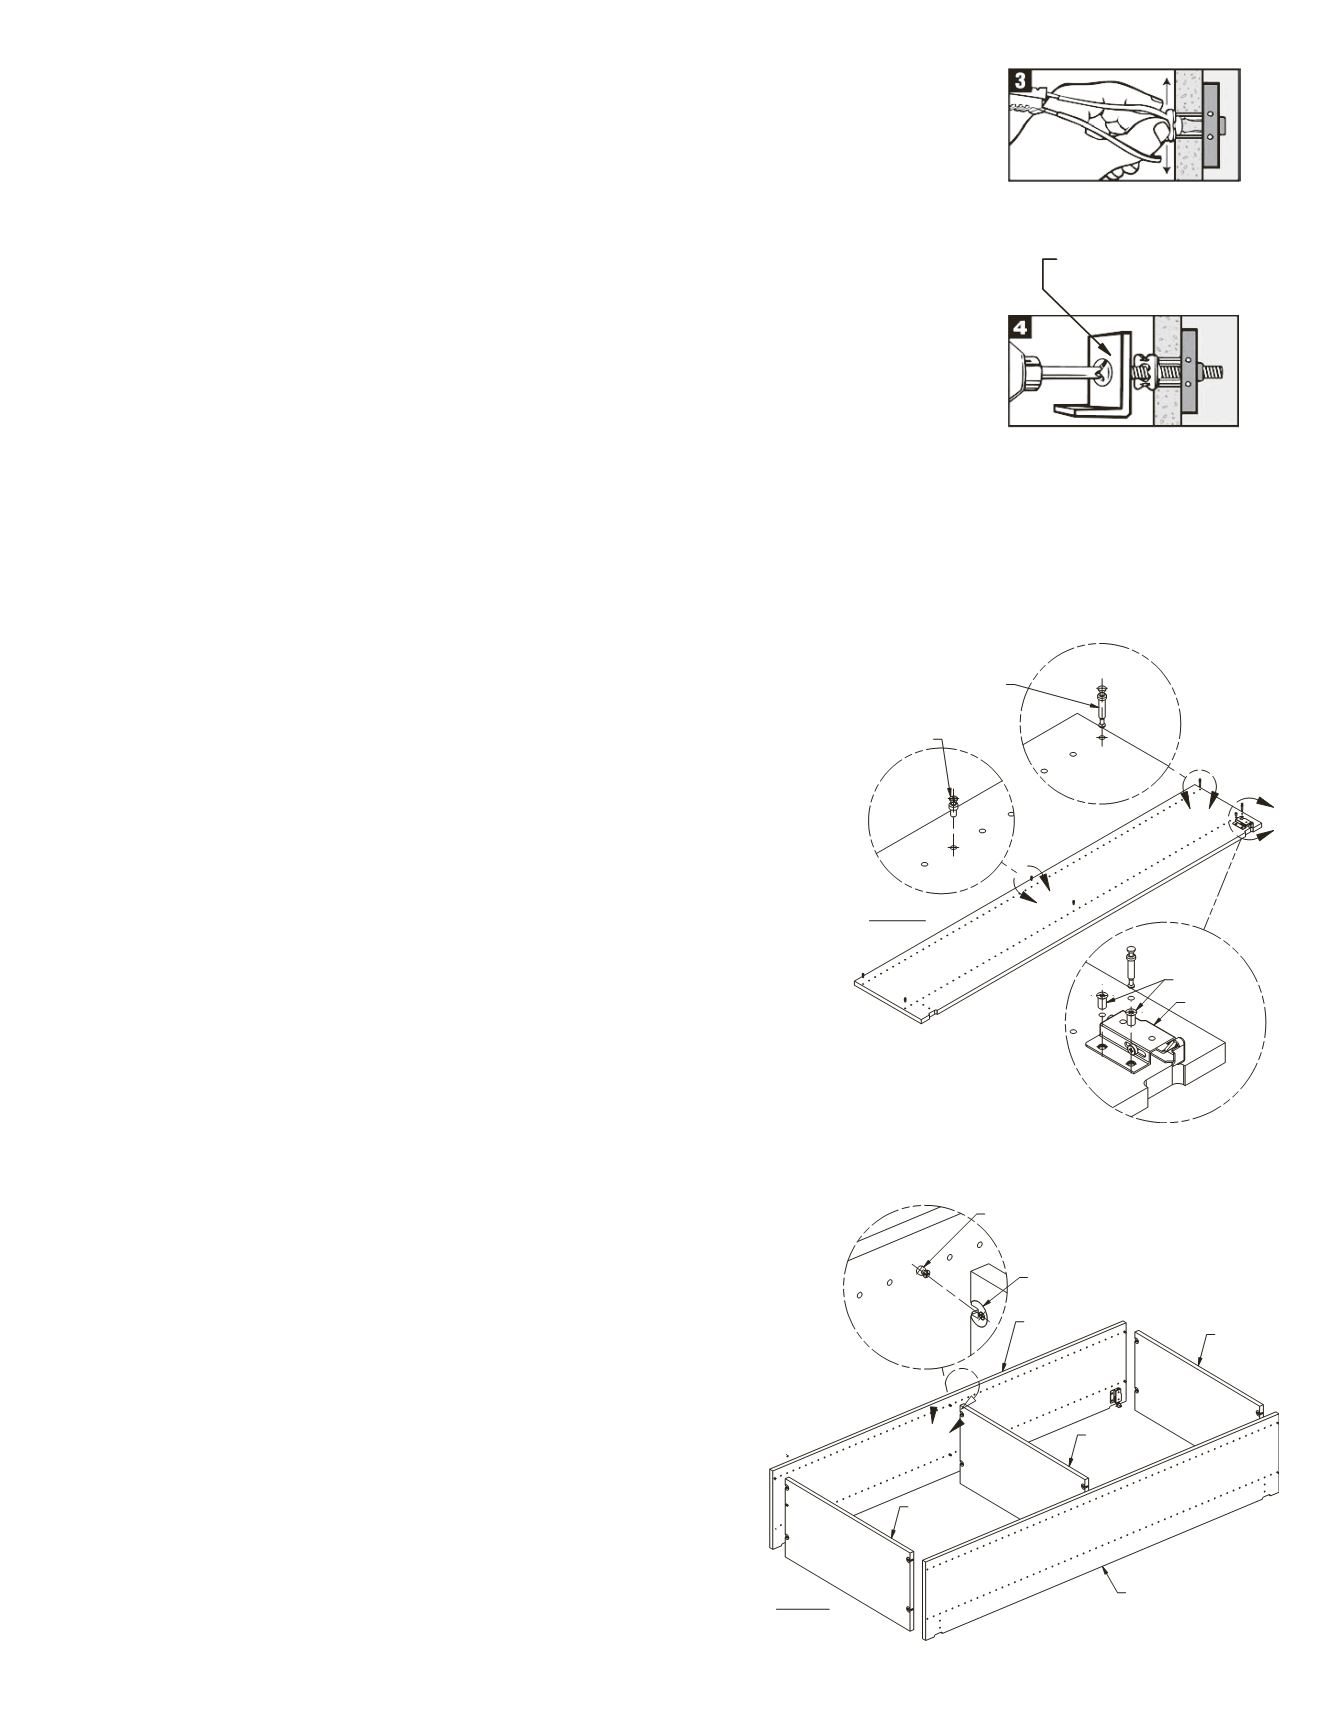
C. Assembling the Tower Unit
1.
Position the Vertical Panels and Fixed Shelves on the
floor as shown in
Figure 5
.
Note:
Fixed Shelves come with the Cam Fasteners
factory installed.
2.
Align the Connecting Bolts in the Vertical Panel with
the Cam Fasteners in the Fixed Shelf.
See Figure 5,
Detail D.
Push the parts together tightly. Using a #2
Phillips Head Screwdriver, tighten the Cam Fasteners
by turning the internal cam ½ turn clockwise. Repeat
this procedure for all Fixed Shelves.
A
B
C
Panel Hanger
Euro Screw
Push-thru Connecting Bolt
Use for Adjacent Shelves
Connecting Bolt
Figure 4
Patented under one or more of the following U.S. Patent Nos.: 4,993,901; 5,028,186; 5,161,296; 5,938,385; 6,161,999; 7,144,212; 7,320,569; and foreign counterparts
thereof and of 4,650,386 and 4,752,170. Other patents pending. TOGGLER and typeface, symbol, TA, TB, TC, TH, ALLIGATOR, SNAPTOGGLE, and SnapSkru are
worldwide registered trademarks of Mechanical Plastics Corp.
Step 3: Place your thumb between the straps at the wall. Push your thumb
side-to-side until the straps snap off flush with the cap flange.
Step 4:
This step is to be completed after attaching the Wall Rail to the
studs. Insert a
1
⁄
4
-20 x 1½” Machine Bolt through the Wall Rail and
into the toggle bolt. Tighten until snug.
Step 2
Step 3
Step 4
Drawing is generic.
Wall Rail design will vary.
D
Fixed Shelf
Fixed Shelf
Fixed Shelf
Vertical Panel
Vertical Panel
Cam Fastener
Connecting Bolt
Figure 5