


 27 / 46

29
C.
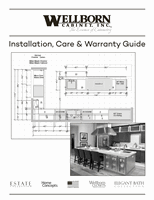
Smooth Close Hinge Adjustment for all Two Door Traditional Overlay Cabinets Without Center
Mullion
1. Height Adjustment: Loosen fixing screw (#1) on all hinges of one door. Move door to desired position.
Retighten fixing screws on all hinges.
2.
Side Adjustment: Loosen side adjustment screw (#2) on all hinges of one door.
Move door to desired position. Retighten fixing screws on all hinges. You have up
to 1.5mm (1⁄16”) in each direction.
3.
Depth Adjustment: The cam (#3) moves the door in and out for depth of each
hinge, just turn to adjust.
4.
Smooth Close Adjustment: On/Off switch on each hinge allows adjustment of door
closure speeds.
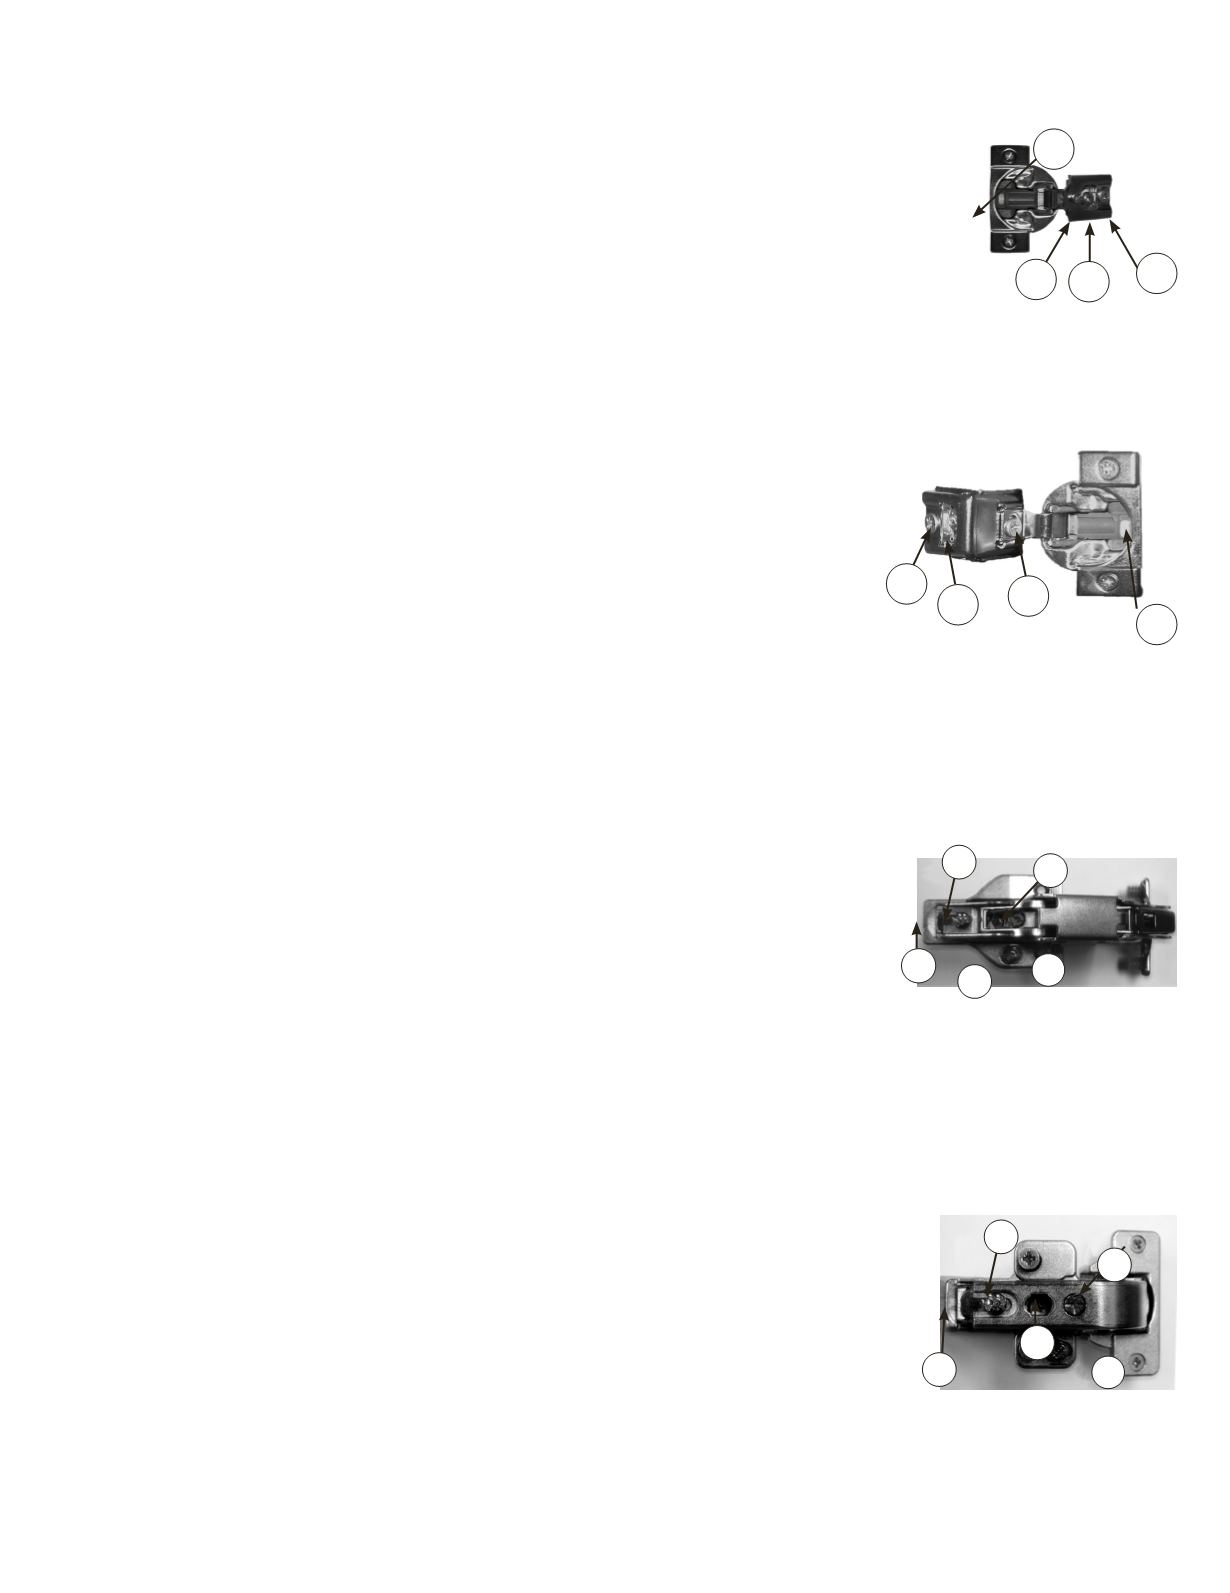
D.
Smooth Close Hinge Adjustment for all Full Overlay Door Styles
1. Height Adjustment: Loosen fixing screw (#1) on all hinges of one door. Move
door to desired position. Retighten fixing screws on all hinges.
2.
Side Adjustment: Loosen fixing screws (#1). Turn side adjustment screw (#2)
until door is in proper position. You have up to 1.5mm (1⁄16”) in each direction.
Retighten fixing screw.
3.
Depth Adjustment: The cam (#3) moves the door in and out for depth of each
hinge, just turn to adjust.
4.
Smooth Close Adjustment: On/Off switch on each hinge allows adjustment of door closure speeds.
Caution:
Doors should not bind on adjacent doors or front of cabinet
E.
Center Hinge Adjustment for Corner Sink Base and 24” High Easy Reach Corner Cabinets
(Traditional or Full Overlay)
1. Height Adjustment: Loosen fixing screws (#1 or #5) on all hinges of one door.
Move door to desired position. Retighten fixing screws on all hinges.
2.
Side Adjustment: Turn side adjustment screw (#2) until door is in proper
position. You have up to 1.5mm (1⁄16”) in each direction.
3.
Depth Adjustment: Loosen fixing screw (#3) and move door to desired position.
Retighten fixing screw.
4.
Door Removal: To remove hinge from mounting plates, press on clip (#4) and remove.
5.
To attach door: Slide into track and press firmly to clip into plate.
F.
Door Hinge Adjustment for Corner Sink Base Cabinets (Traditional or Full Overlay)
1.
Height Adjustment: The cam screw (#1) moves the door up and down, just turn to adjust.
2.
Side Adjustment: Turn side adjustment screw (#2) until door is in proper
position.
3.
Depth Adjustment: Loosen fixing screw (#3) and move door to desired
position. Retighten fixing screw. The cam screw (#4) allows for additional depth
adjustment if necessary.
4.
Door Removal: To remove hinge from mounting plate, pull up on locking clip (#5).
5.
To attach the door: Slide the hinge into the mounting plate track and press firmly until a “click” is heard.
*TOL
1 3
2
4
*FOL
1 2
4
3
1
3
4
5
2
*TOL/FOL
*TOL/FOL
1
3
4
5
2
* Use a #2 Phillips Head Screwdriver for all adjustments.
** Use a #2 Phillips Head Screwdriver and a #2 POZI tip screwdriver for all adjustments.