


 28 / 46

30
G.
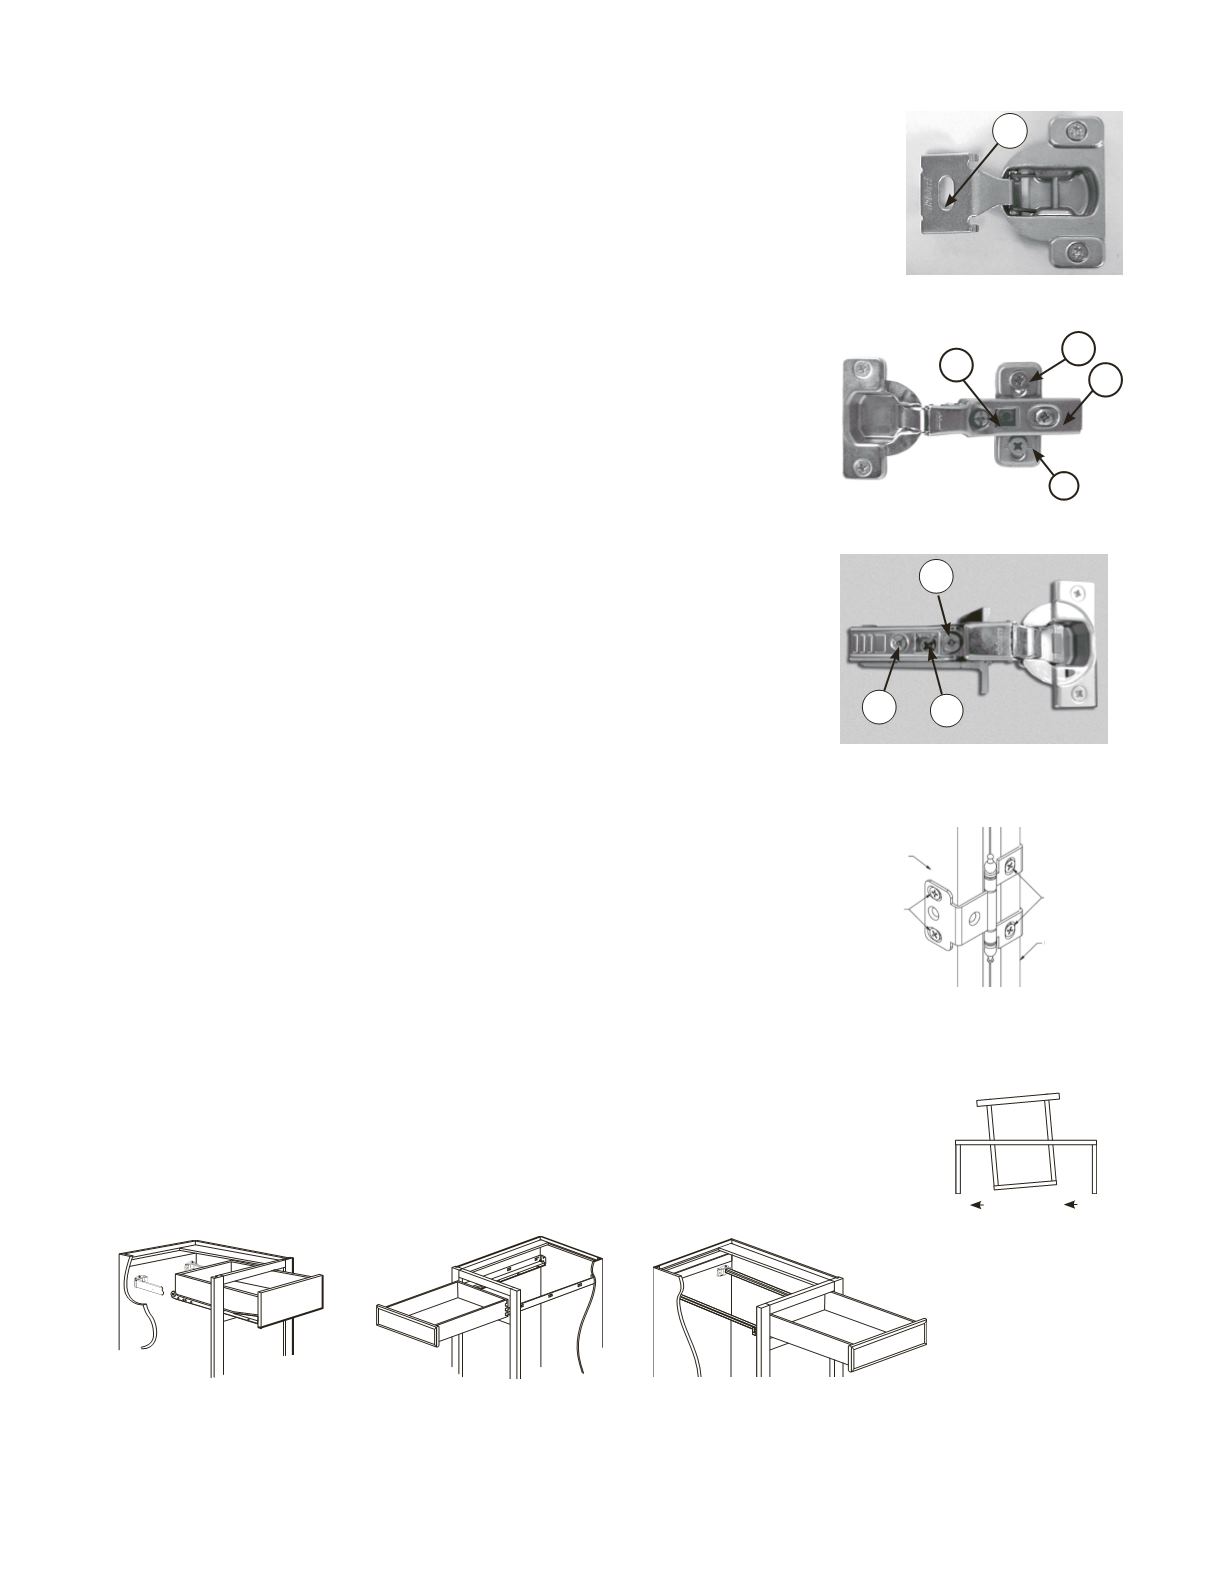
Two Way Adjustable Hinge for Traditional Overlay Door Styles or Full Overlay Diagonal Corner
Cabinets
Height Adjustment: Loosen fixing screw (#1) on all hinges of one door. Move door to
desired position. Retighten fixing screws on all hinges.
H.
Hinge Adjustment for Wellborn Closets**
1. Side Adjustment: Rotate the front screw to increase or decrease the door
overlay (+/- 2 mm).
2.
Depth Adjustment: Rotate the rear spiral tech cam screw to adjust the door
position (+ 3/- 2 mm).
3.
One-Piece Wing Plate: Loosen screws on the mounting plate. Adjust door to
position and tighten screws (+/- 3 mm).
I.
Hinge Adjustment for Concealed Hinge Inset Doors
1.
Height Adjustment: Rotate cam screw on mounting plate to adjust door
position (+/- 2 mm). On non-cam mounting plates, loosen screws, adjust door
and retighten screws.
2.
Side adjustment: Rotate front screw to increase or decrease door overlay
(+/- 2 mm).
3.
Depth adjustment: Rotate rear spiral tech cam screw to adjust door gap
(+3 mm, -2 mm).
J.
Hinge Adjustment for Barrel Hinge Inset Door
1.
Horizontal Adjustment: Loosen all hinge attachment screws on the back of the
door. Adjust the door to the desired position. Tighten the hinge attachment
screws and check fit. Repeat if necessary.
2.
Vertical Adjustment: Loosen all hinge attachment screws on the inside of
the cabinet frame. Adjust the door to the desired position. Tighten the hinge
attachment screws and check fit. Repeat if necessary.
II .
DRAWER
If your drawer is out of alignment, it can be easily corrected. Determine what type of drawer
mounts you have on your cabinetry and follow the corresponding directions.
Top
View
Full-Extension Undermount
Sidemount
Full Access
1
3
1
3
2
1 3
2
Door
Vertical
Adjustment
Cabinet
Frame
Horizontal
Adjustment
*TOL/FOL
*INS
*INS
* Use a #2 Phillips Head Screwdriver for all adjustments.
** Use a #2 Phillips Head Screwdriver and a #2 POZI tip screwdriver for all adjustments.