


 29 / 46

31
A.
Sidemount Drawer Slides
Side-to-Side Adjustments: The drawer slides can be adjusted at the back of the cabinet by moving the
drawer slide side to side within the plug-in bracket
B.
Full Access Drawer Slides
1.
Height Adjustments: The height of the drawer can be adjusted at the front
using the rollers on the front fixing clips located underneath the drawer.
2.
Side-to-Side Adjustments: The drawer slides can be adjusted at the back of the
cabinet by moving the intermediate bracket piece side to side within the plug-in
back plate
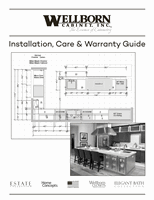
C.
Full Extension Soft Close Undermount Drawer
1.
Height Adjustments (Upper Adjustment only): Press up on the latch. Push towards
the back of the drawer.
2.
Side-to-Side Adjustments: The drawer slides can be adjusted in the back of the
cabinet by moving the intermediate bracket piece side to side within the plug-in
back plate.
3.
Drawer Removal: Squeeze the orange handles on the locking devices. Pull the drawer
straight out and up.
4.
Drawer Installation: Place the drawer on the runners and close. The locking devices
will automatically engage the runners.
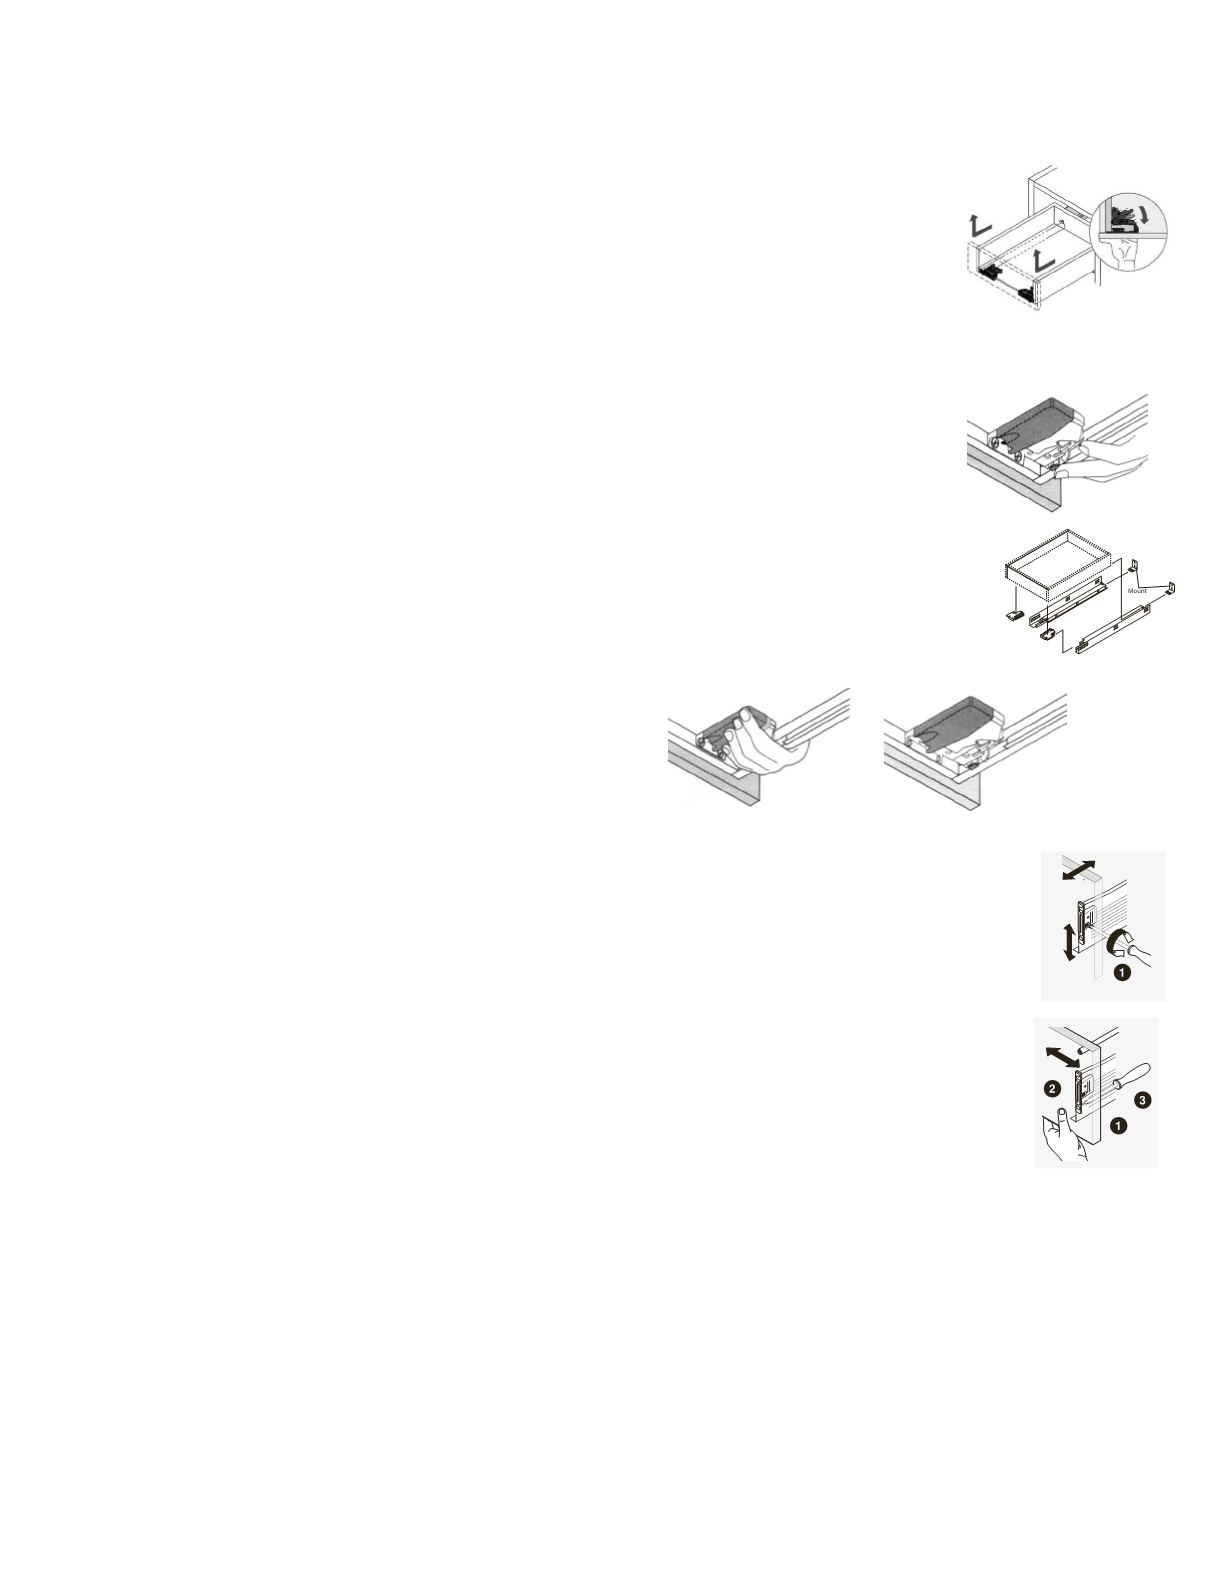
D.
Metal Drawer Boxes
1.
Height Adjustment: Adjust the height cam.
2.
Side Adjustment: Loosen fixing screws, adjust front, tighten screws.
III.
SHELVES
1.
Using the pre-drilled holes in the end panels, select the locations for your shelves.
2. Measure from the floor of the cabinet to the center of the selected hole.
3. Transfer this measurement to the back panel of the cabinet. Make a mark at this height along the center of
the back panel.
Note:
This mark is for a drill hole that will accept a shelf clip. It is important that the distance from the hole to
the floor of the cabinet be the same as that of the location of the existing hole in the end panels and the
back of the face frame (wall cabinets) which also has a set of pre-drilled holes.