


 26 / 46

28
XVI. ACCESSORY KITS
Wellborn Cabinet, Inc. offers many accessory kits that add additional storage options to your cabinetry.
Installation Instructions are included in every accessory kit that is ordered. Some of the instructions are also
available for download from our web sites at
wellbornandyou.comor
wellborn.com .Important Installation Notes for Drawer Fronts
I.
SELECT
5-piece drawer fronts attached to plywood dovetail or wood dovetail drawer boxes will have additional bumpers
placed on the 'figure 8' drawer front attachment brackets for added protection during shipping. These bumpers
should be removed after cabinet installation.
II.
PREMIER, ESTATE, AND ELEGANT BATH
Overlay 5-piece drawer fronts will have additional bumpers placed on the 'figure 8' drawer front attachment
brackets for added protection during shipping. These bumpers should be removed after cabinet installation.
Adjustments
I.
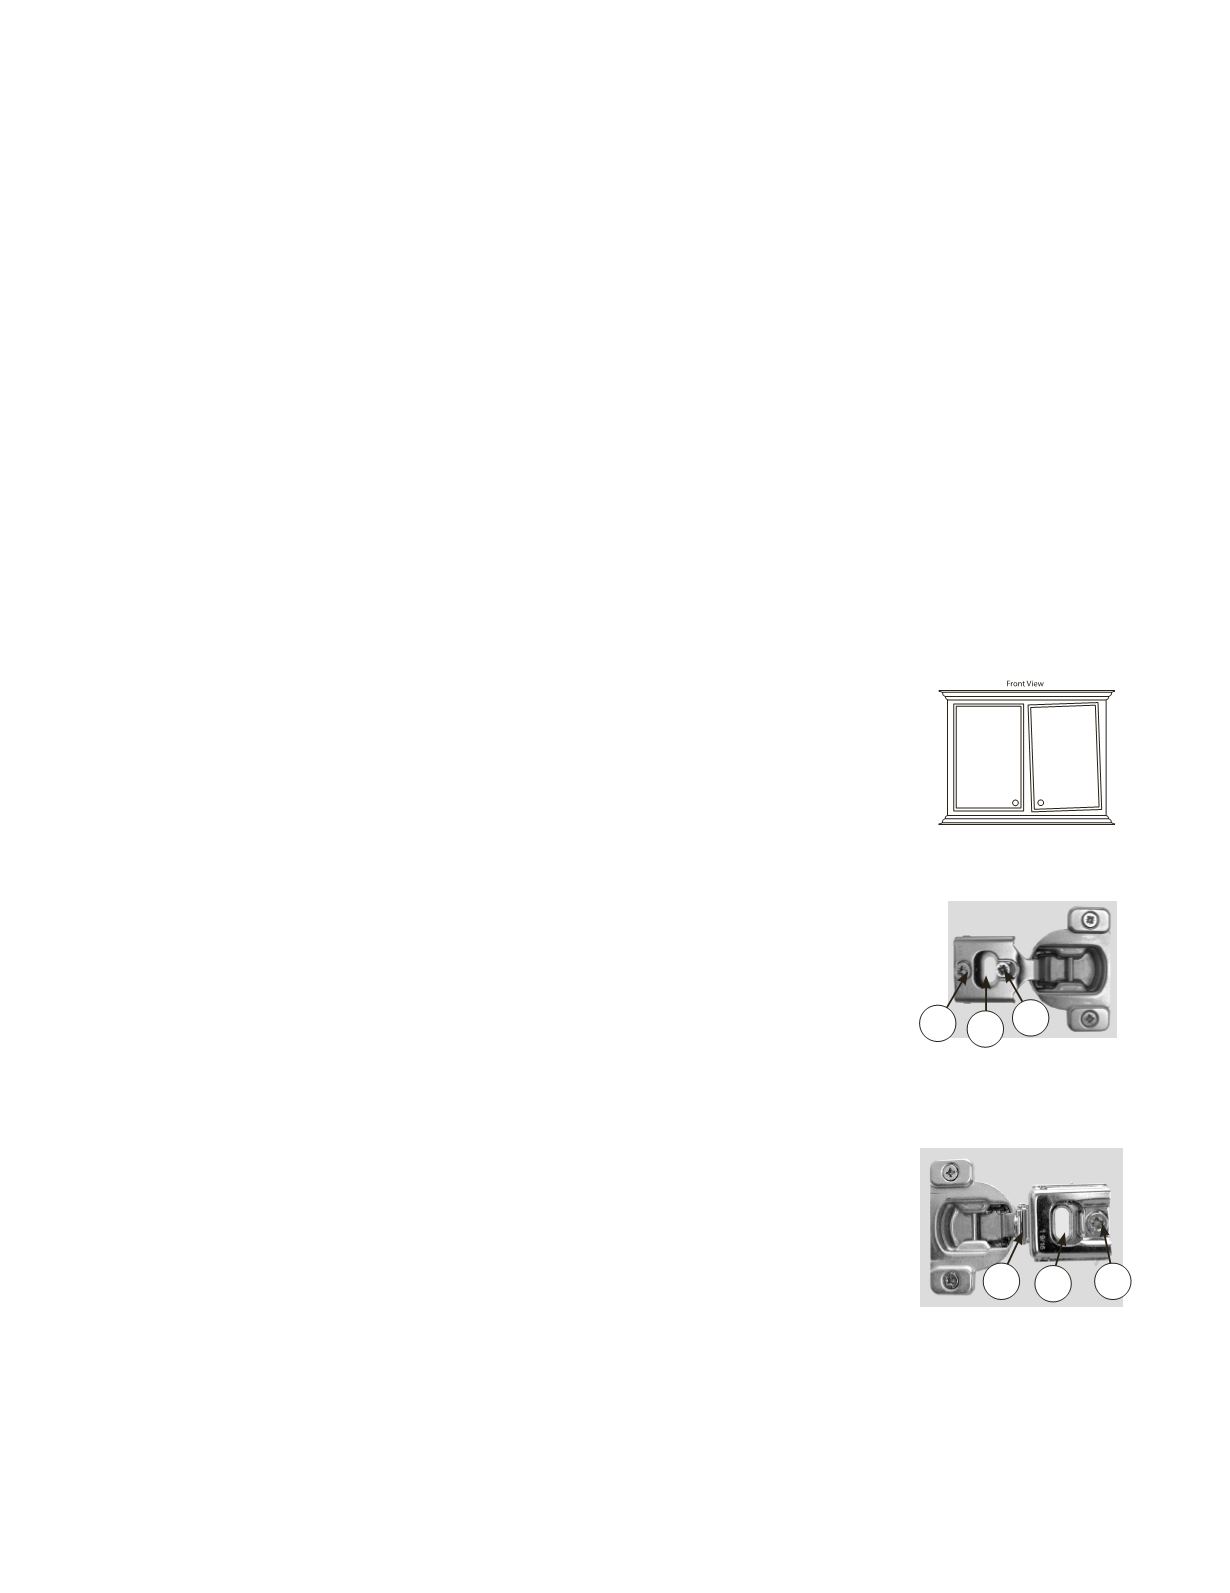
DOOR AND HINGE
If your door is out of alignment, determine the hinge type on your cabinets based on the
photographs below and use the following steps to make the necessary adjustments.
A.
Hinge Adjustment for all Two Door Traditional Overlay Cabinets Without
Center Mullion
1. Height Adjustment: Loosen fixing screw (#1) on all hinges of one door. Move door to
desired position. Retighten fixing screws on all hinges.
2.
Side Adjustment: Loosen side adjustment screw (#2) on all hinges of one door. Move door
to desired position. Retighten fixing screws on all hinges. You have up to 1.5mm (1⁄16”) in
each direction.
3.
Depth Adjustment: The cam (#3) moves the door in and out for depth of each hinge, just
turn to adjust.
B.
Hinge Adjustment for all Full Overlay Door Styles
1.
Height Adjustment: Loosen fixing screw (#1) on all hinges of one door. Move door to desired
position. Retighten fixing screws on all hinges.
2.
Side Adjustment: Loosen fixing screws (#1). Turn side adjustment screw (#2)
until door is in proper position. You have up to 1.5mm (1⁄16”) in each direction.
Retighten fixing screw.
3.
Depth Adjustment: The cam (#3) moves the door in and out for depth of each
hinge, just turn to adjust.
Caution:
Doors should not bind on adjacent doors or front of cabinet.
*TOL
1 2
3
*FOL
3
2 1
* Use a #2 Phillips Head Screwdriver for all adjustments.
** Use a #2 Phillips Head Screwdriver and a #2 POZI tip screwdriver for all adjustments.