


 30 / 46

32
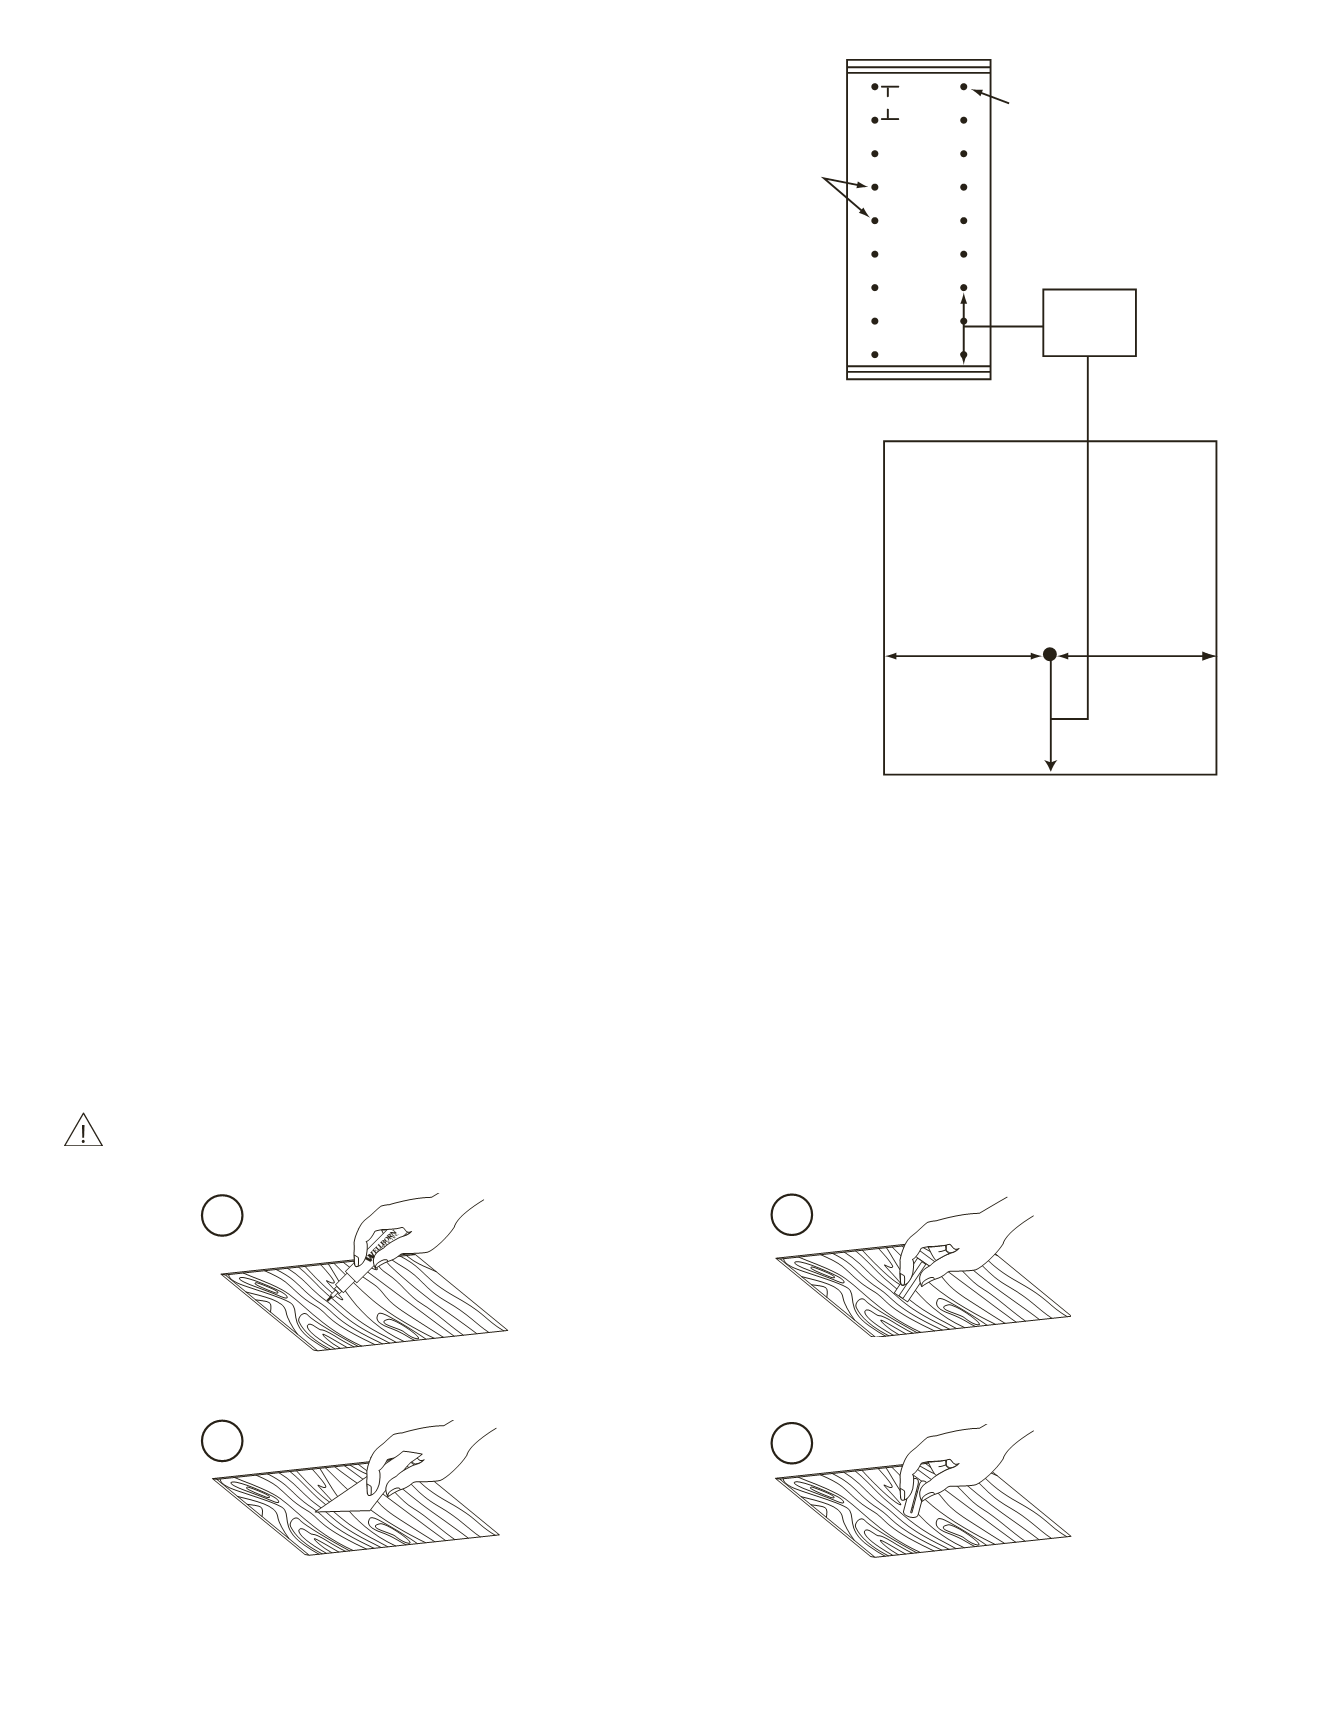
Next, rub the putty stick over the
area to cover the void left behind.
Remove excess wax with the flat
stick that comes in the kit.
Lightly use the buffing pad to
restore original luster.
1
2
3
4
Scratches can be repaired with the marker and wax
sticks. Apply marker to scratch, then wipe off excess.
Repair and Maintenance
I.
REPAIR
A.
Minor Nicks and Scratches and Nail Hole Repair
Even with the best care and cleaning, minor nicks and scratches are bound to appear. It is always preferable
to treat these problems while they are still minor. Wellborn has included sample putty sticks with this packet
for minor repairs. A complete touch-up kit that includes a putty stick, touch-up marker and touch-up finish
can be obtained through your Authorized Wellborn Dealer.
YOU SHOULD NOT ATTEMPT TO REPAIR BADLY DAMAGED CABINETRY YOURSELF. CONSULT YOUR LOCAL
DEALER OR REFINISHER FOR ASSISTANCE.
4. Drill a hole with a 7⁄32" drill bit at the specified mark to
accept the rear plastic shelf clip. Insert the plastic clip
so that it locks into this hole on the cabinet back.
5.
Insert the locking shelf clips in the pre-drilled holes
in the end panels. After placing the shelf in the clips,
installation is complete.
Repeat steps 1-5 for each shelf location.
Note:
The center shelf clip must be installed correctly for
proper usage and safety. When installed properly,
the adjustable shelves are rated to hold 15 lbs. per
square foot per KCMA standards. We cannot accept
responsibility for damages due to the failure to follow
installation procedures.
Pre-Drilled End Panel
Front View of the Back Panel
Mark must be centered on
the back panel of the
cabinet
Drill a
7
/
32
" hole to accept
the center shelf clip
Existing
Adjustable
Shelf Holes
Transfer selected
shelf height from
the end panel to
the back panel
for a drill hole
2
1
/
2
"
Ø
1
/
4
"