


 19 / 46

21
XII. COUNTERTOP
When all cabinetry is installed, you will be ready for countertop installation. While laminates and
ceramic tiles are installed to fit on site, solid surfacing such as Corain, marble, granite or wood tops are
fabricated at an off-site location. A fabricator can use a CAD drawing of your layout to fabricate these tops
when layouts are of a simple design. On more difficult applications or to be 100% certain your countertop will
be fabricated to your exact specifications, the installed base cabinets can be used as a template.
XIII. APPLIANCES AND PLUMBING
WHEN IN DOUBT DO NOT BE AFRAID TO CONSULT OR HIRE AN ELECTRICIAN AND/OR A PLUMBER. IT IS BETTER
TO BE SAFE THAN SORRY.
ALWAYS TURN OFF GAS, ELECTRIC AND WATER BEFORE INSTALLATION OF SINKS AND APPLIANCES.
Before you install appliances, please review and verify your design has the following safety features:
1. Dedicate 120V outlets/circuits for each of the following: refrigerator, dishwasher, garbage disposal microwave,
freezer, trash compactor, washing machine and larger toaster oven.
2. Dedicate 240V outlets/circuits for each of the following: electric range, electric cook top, electric oven, electrical
dryer, electric water heater and air conditioning units.
3. Allow no doors to interfere with any appliance.
4. Space receptacles along the backsplash at 18”–30” apart and at each end of an island.
5. Install GFCI outlets within 6’ of sink area.
6. Provide low voltage task lighting above work areas: range, sink, food preparation and eating areas.
7. Provide a smoke detector and a fire extinguisher in the kitchen area.
8. Provide ventilation for the cooking area—one that removes odors, smoke, heat, moisture and grease. A minimum
of 250 CFM is recommended and should be vented to the outdoors.
9. Allow a minimum of 24” from the cooking surface to a vented hood above and a minimum of 30” to an
unprotected cabinet.
FIRE CODES VARY FROM STATE TO STATE, EVEN BETWEEN CITIES. PLEASE CONSULT LOCAL AUTHORITIES
ABOUT FIRE CODES FOR YOUR AREA.
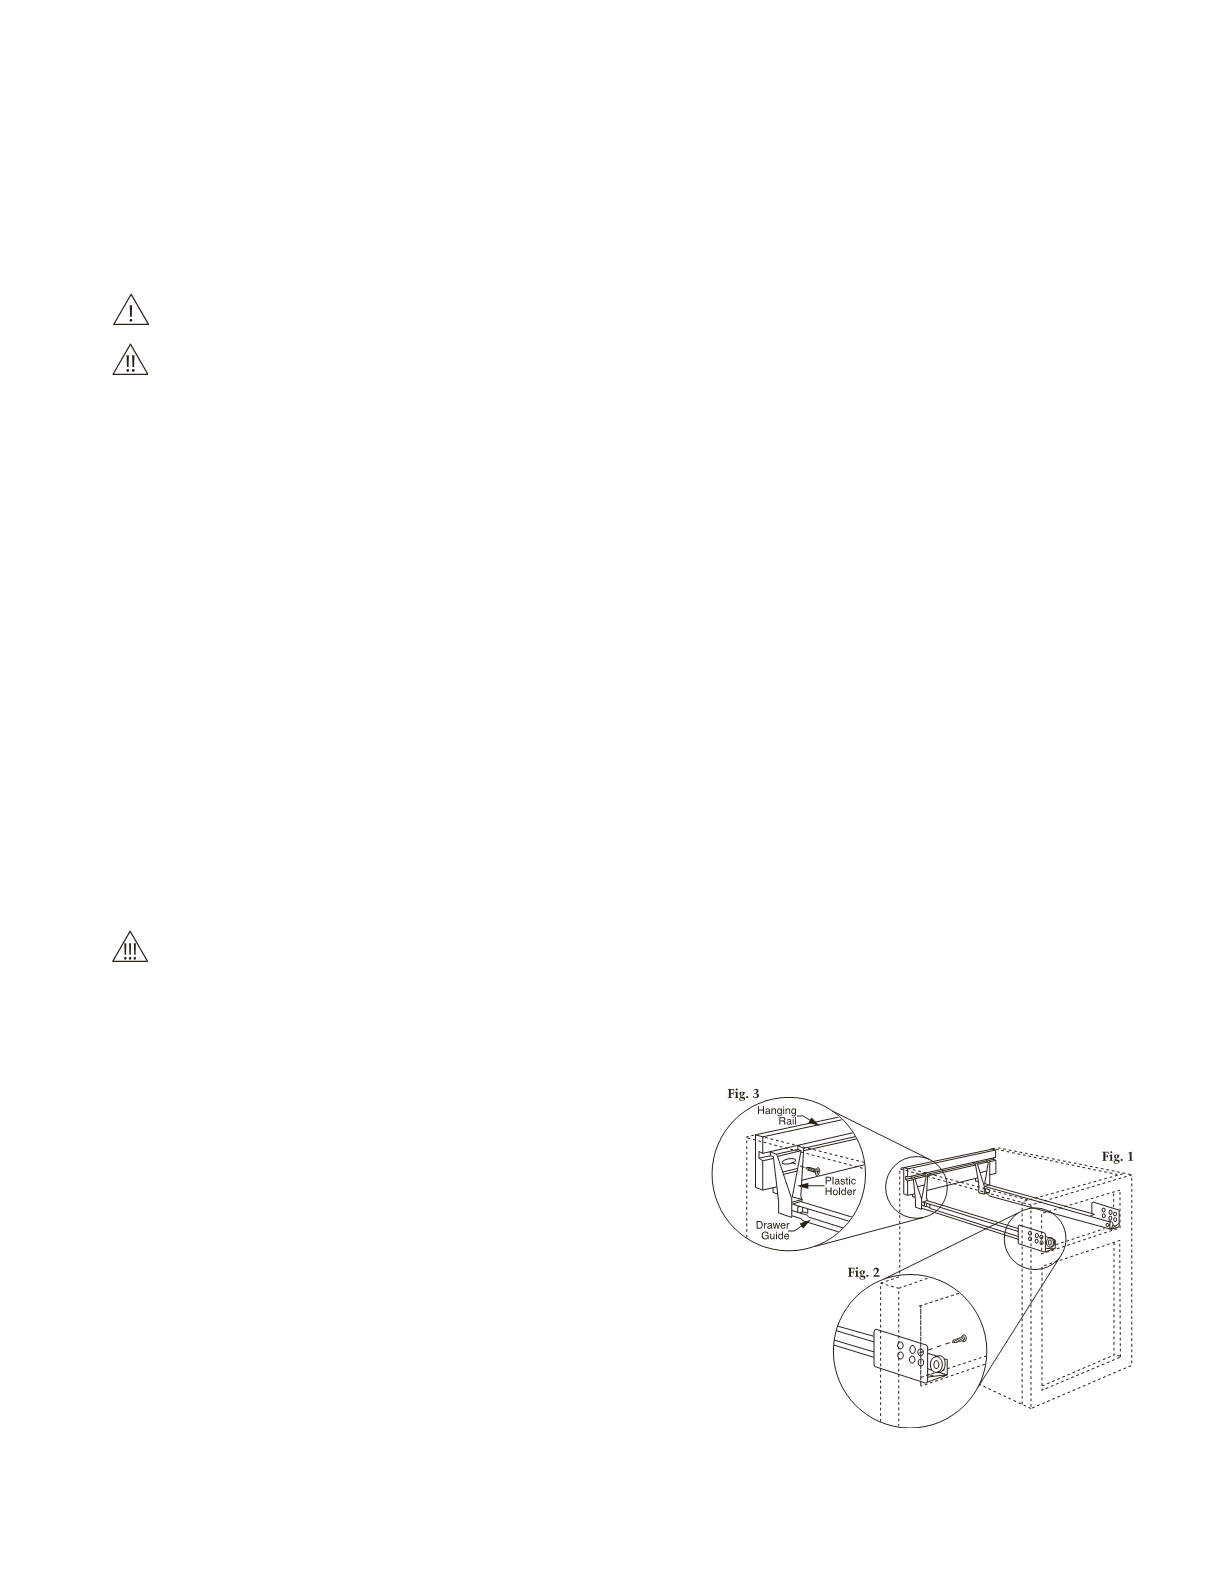
XIV. UNDERMOUNT DRAWER SLIDES
1. Remove old hardware.
2. Install rear plastic holder onto cabinet hardware
members.
3. Install runners into cabinet as shown in
Fig. 1.
.
4. Install screws into face frame as in
Fig. 2
.
5. Insert drawer into opening to align drawer slides.
6. Remove drawer and install screws into rear
plastic holders as in
Fig. 3
.