


 15 / 46

17
B. Securing Base Cabinets
1. You can align and fasten together an entire section of base cabinets before you secure them to the wall. This
often makes it easier to ensure that they will install plumb and level.
a. Lay the cabinets on the floor on their backs.
b. Shim and level the face frames so they are flush and clamp them together using 4” C-clamps.
2. Most installers secure and align the cabinets as they go.
a. Cabinets are secured to each other by first using 4” C-clamps
to hold the face frames so they are flush from cabinet top to
bottom.
b. Use a rubber mallet to bump face frame in or out if needed for
flushness.
c. Predrill a ⅛” hole through face frame of the first cabinet and into
the adjacent cabinet’s face frame.
d. Use a #8 2½” screw to secure through the pre-drilled hole and into the second cabinet, moving the C-clamp
down the face frame as needed for flushness.
V. WALL MOUNT VANITIES
Because of the design characteristics of the Wall Mount Vanity, Wellborn Cabinet, Inc. recommends our Wall Mount
Vanities be installed strictly in accordance with the following instructions. Failure to follow this installation instruction
may result in an unintended separation of the vanity from the wall and could potentially cause injury or damage to
property. Any damage to the vanity resulting from failure to follow these instructions is not covered by our warranty.
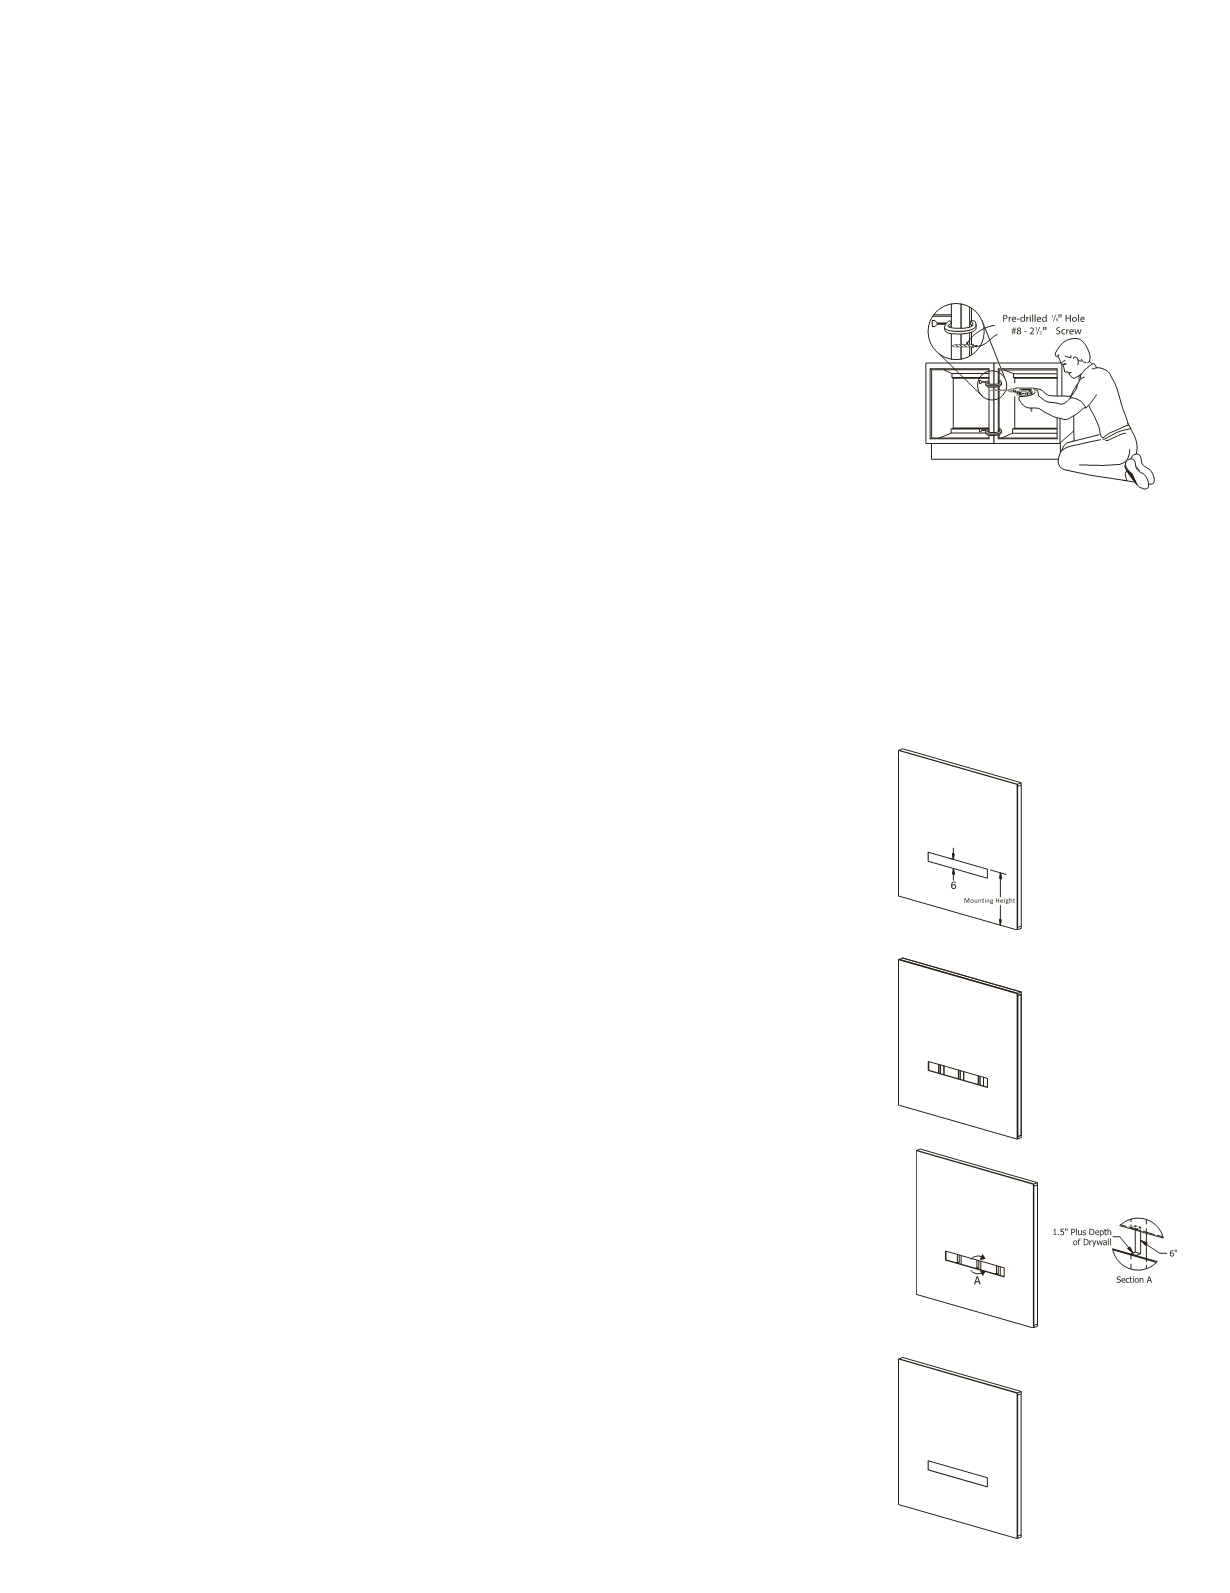
1.
Draw lines at the determined mounting height. Place another 6” below and
parallel to the previous line.
2.
Using the previous lines as guidelines, cut out and remove the 6” strip of
drywall. Length of the opening is determined by the width of the cabinet
combined with the distance to the wall stud in each direction.
3.
Place the 2 x 6 in the removed section of drywall, using it to draw
guidelines on the face of the studs which will be the top and bottom of
the notch. A circular saw should be used to make two cuts to the proper
depth (1.5” on the studs, plus the thickness of the drywall). Additional
cuts in between these cuts may be needed to make it easier to remove
the excess. Once the excess is removed, the notches may need cleaning
with a wood chisel.
4.
Insert the 2 x 6 into the notched area. The 2 x 6 must be secured with a
minimum of two (2) 3” screws (not included) and construction adhesive
on each stud. Once secured, the stud should be flush with the face of
the 2 x 6.