


 20 / 46

22
XV. WELLBORN CLOSETS
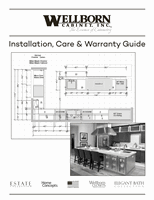
A. Wall Rail
These installation instructions are for a typical 84” high installation. For other
heights, the instructions should be adjusted accordingly.
1.
Using a level, draw a line across the wall 82” above the floor. Locate and
mark the wall studs
11
⁄
16
” below the line.
See Figure 1.
Mark the location of
each Vertical Panel on the wall below the line.
2.
Determine the finished width of the installation. Cut the Wall Rail 1” less
than the finished width.
See Figure 1
.
3.
Position the top of the Wall Rail flush with the line and mark the wall
stud and Vertical Panel locations in relation to the mounting holes in the
Wall Rail.
4.
Using a
1
⁄
8
” drill bit, drill pilot holes at the marked locations. If a pilot
hole misses a stud, recheck the locations and repeat the process. The
Wall Rail should be attached to all available studs. Hold the Wall Rail
in place and secure to studs using #8 x 2½” Pan Head Screws (not
supplied).
See Figure 2
.
5.
The Wall Rail Cover should be installed before hanging any components.
Cut the Wall Rail Cover to the required length. Hook the Wall Rail Cover
(paintable to match) over the top of the Wall Rail and snap in place at
the bottom.
See Figure 3
.
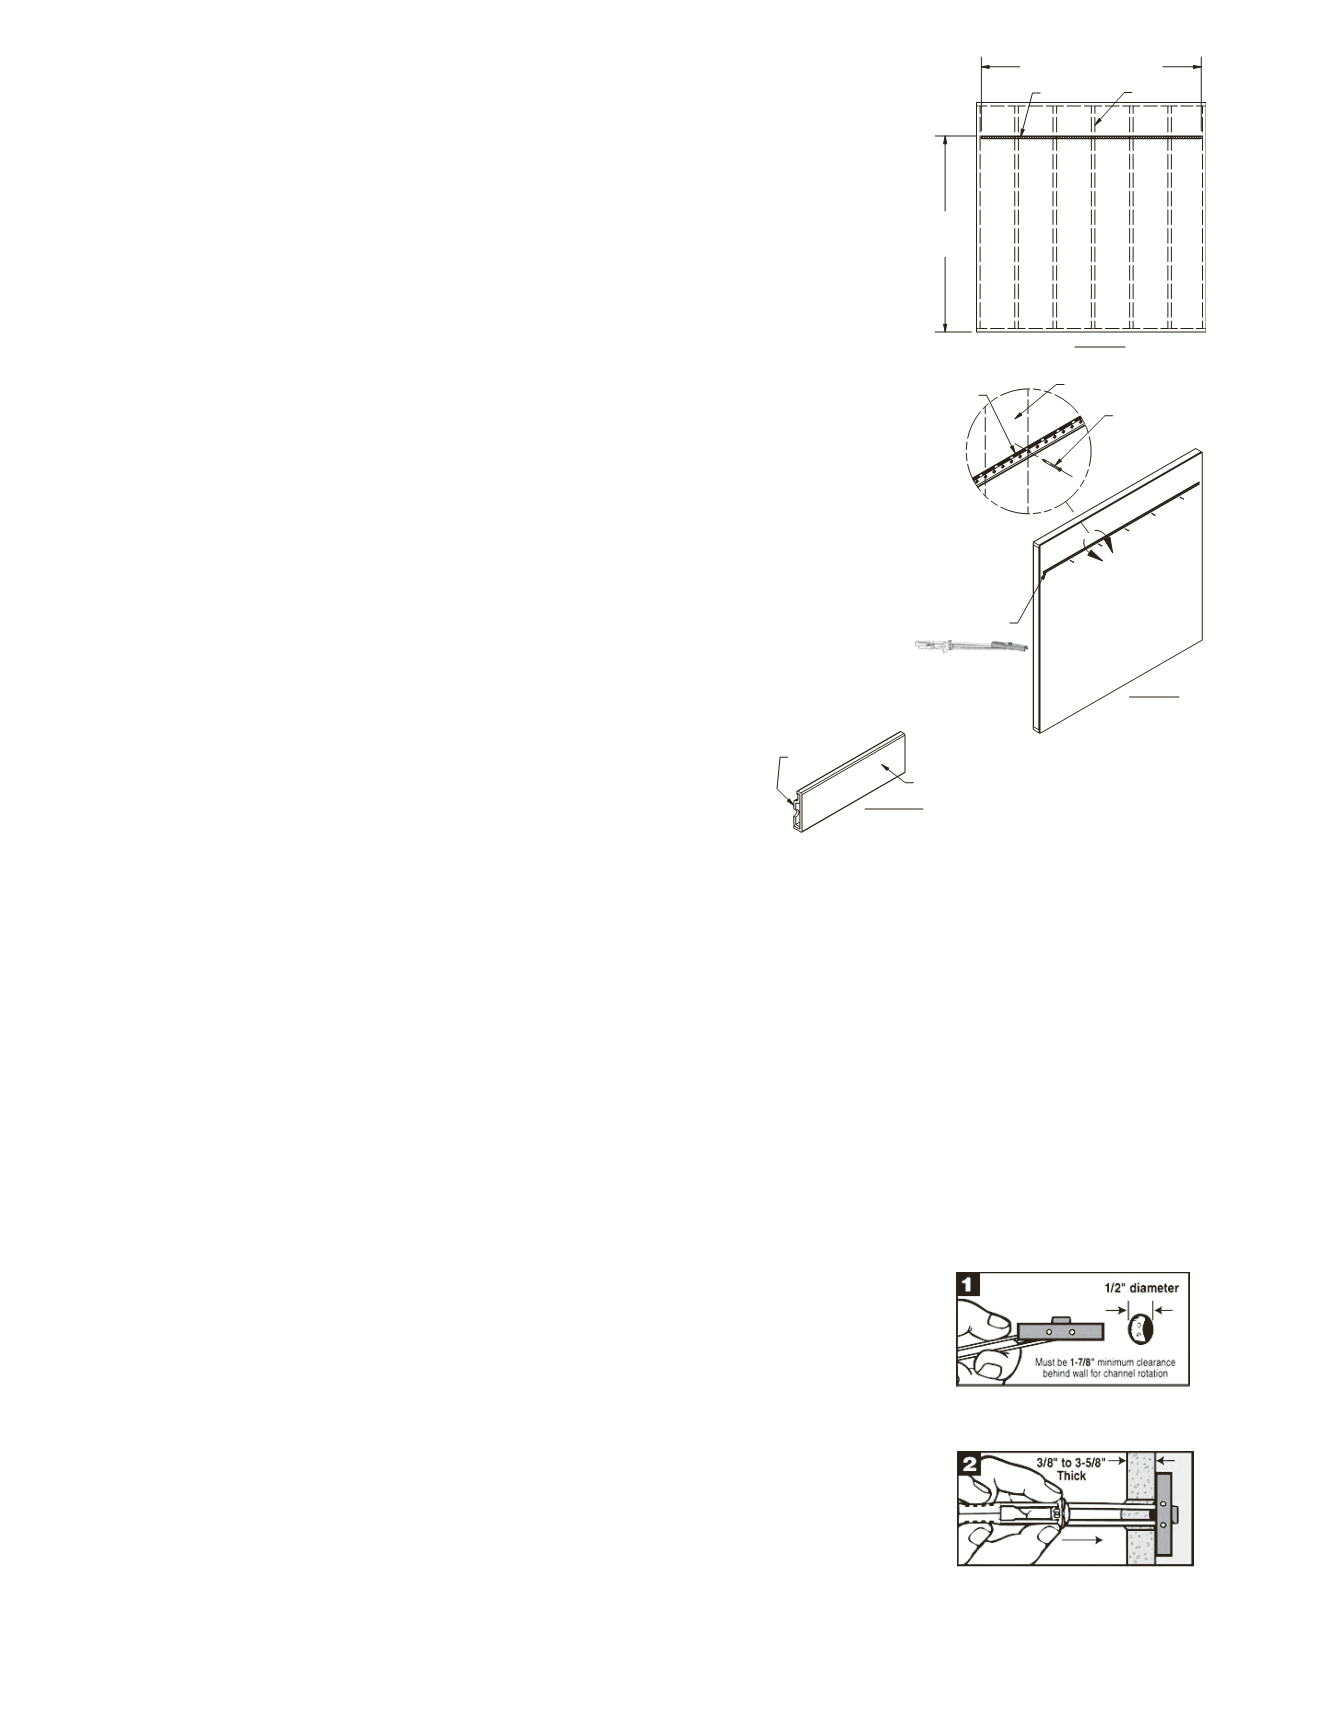
Toggle Bolt Requirements
• If the end of the Wall Rail extends past a stud, a toggle bolt will need to be installed to support the end.
• If the wall stud spacing is greater than 16”, a toggle bolt should be installed between the studs for additional
support.
• If Vertical Panel is more than 6” from a wall stud, a toggle bolt should be installed adjacent to the Vertical
Panel.
Mark the location(s) for the toggle bolt(s) on the wall and the Wall Rail.
Note:
Toggle bolts must be installed before the Wall Rail is attached to the wall.
See Toggle Bolt Installation
instructions.
Toggle Bolt Installation
Step 1: At the marked location(s) drill a ½” hole through the wallboard. Hold the
metal channel flat alongside the plastic straps and insert the channel
through the hole.
Note:
A minimum 1
7
⁄
8
” clearance is required behind
the wallboard.
Step 2: Hold the ends of the straps together between your thumb and
forefinger and pull towards you until the channel rests against the
back of the wallboard. With your other hand, slide the cap along the
straps until the flange of the cap is flush with the wall.
SNAPTOGGLE®
Step 1
Step 2
A
82"
Top of
Wall Rail
Wall Rail
Wall Studs
Wall Studs
Wall Rail
#8 x 2" Screw
Wall Rail Length =1" less than
Overall Width
See Toggle Bolt
Installation
Figure 1
Figure 2
SNAPTOGGLE
®
Toggle Bolt Installation
Step 1
Step 2
Step 3
Step 4
Drawing is generic.
Wall Rail design will vary.
Figure 3
Wall Rail Cover
Wall Rail