


 791 / 872

Premier–12–11
Marketing Materials
Design Center and Wall Mount Display Door Replacements
Eligible for 100% Co-op Reimbursement
Display Doors
Display Doors include the door style decal on back.
These doors can be ordered for the Wall Mount Display. The size is 14
5
⁄
8
” x
14
1
⁄
8
”. Finish and finish technique charges will apply. Use the following codes
to order replacement display doors for overlay and inset door styles:
• Overlay ordering code:
FD1414DD $150 List
• Inset ordering code:
IFD1414DD $173 List
Ordering Example:
FD1414DD PRE MRY MPL LGT
FD1414DDs and IFD1414DDs Available in the Quick Ship Program
FD1414DDs in any combination are available to ship five (5) business days from Wellborn rush order cut off date and
IFD1414DDs in any combination are available to ship nine (9) business days from Estate rush order cut off date. Ten (10)
Quick Ship Display Doors are available across all the Wellborn Cabinet, Inc. brands. All other FD1414DDs will be shipped
in 13-18 business days.
Display Doors are available
to order 6 weeks prior
to the door style/finish
availability date for any
new door style/finish
combinations, unless
otherwise announced.
Installation Instructions:
Mounting the Top Wall Mount Display (B9210 and B9220)
Locate the wall studs in the area you have chosen for your Display. The unit should be
centered over two studs.
Mark the stud locations on the Display Unit and pre-drill four holes in the flat center area
behind the doors display area (see drawing). Attach the unit to the wall with four (min.
2½”) drywall screws at the pre-drilled locations. Be sure the screws penetrate the wall
studs and the unit pulls tight to the wall. Cover the screw heads with caps if desired.
Mounting the Lower Wall Mount Display (B9215 and B9225)
Repeat the procedures above for locating and pre-drilling for installation screws. Slide the
lower unit into the bottom of the upper unit and attach the unit to the wall with four
(min. 2½”) drywall screws at the pre-drilled locations. Be sure the screws penetrate the
wall studs and the unit pulls tight to the wall. Cover the screw heads with caps if desired.
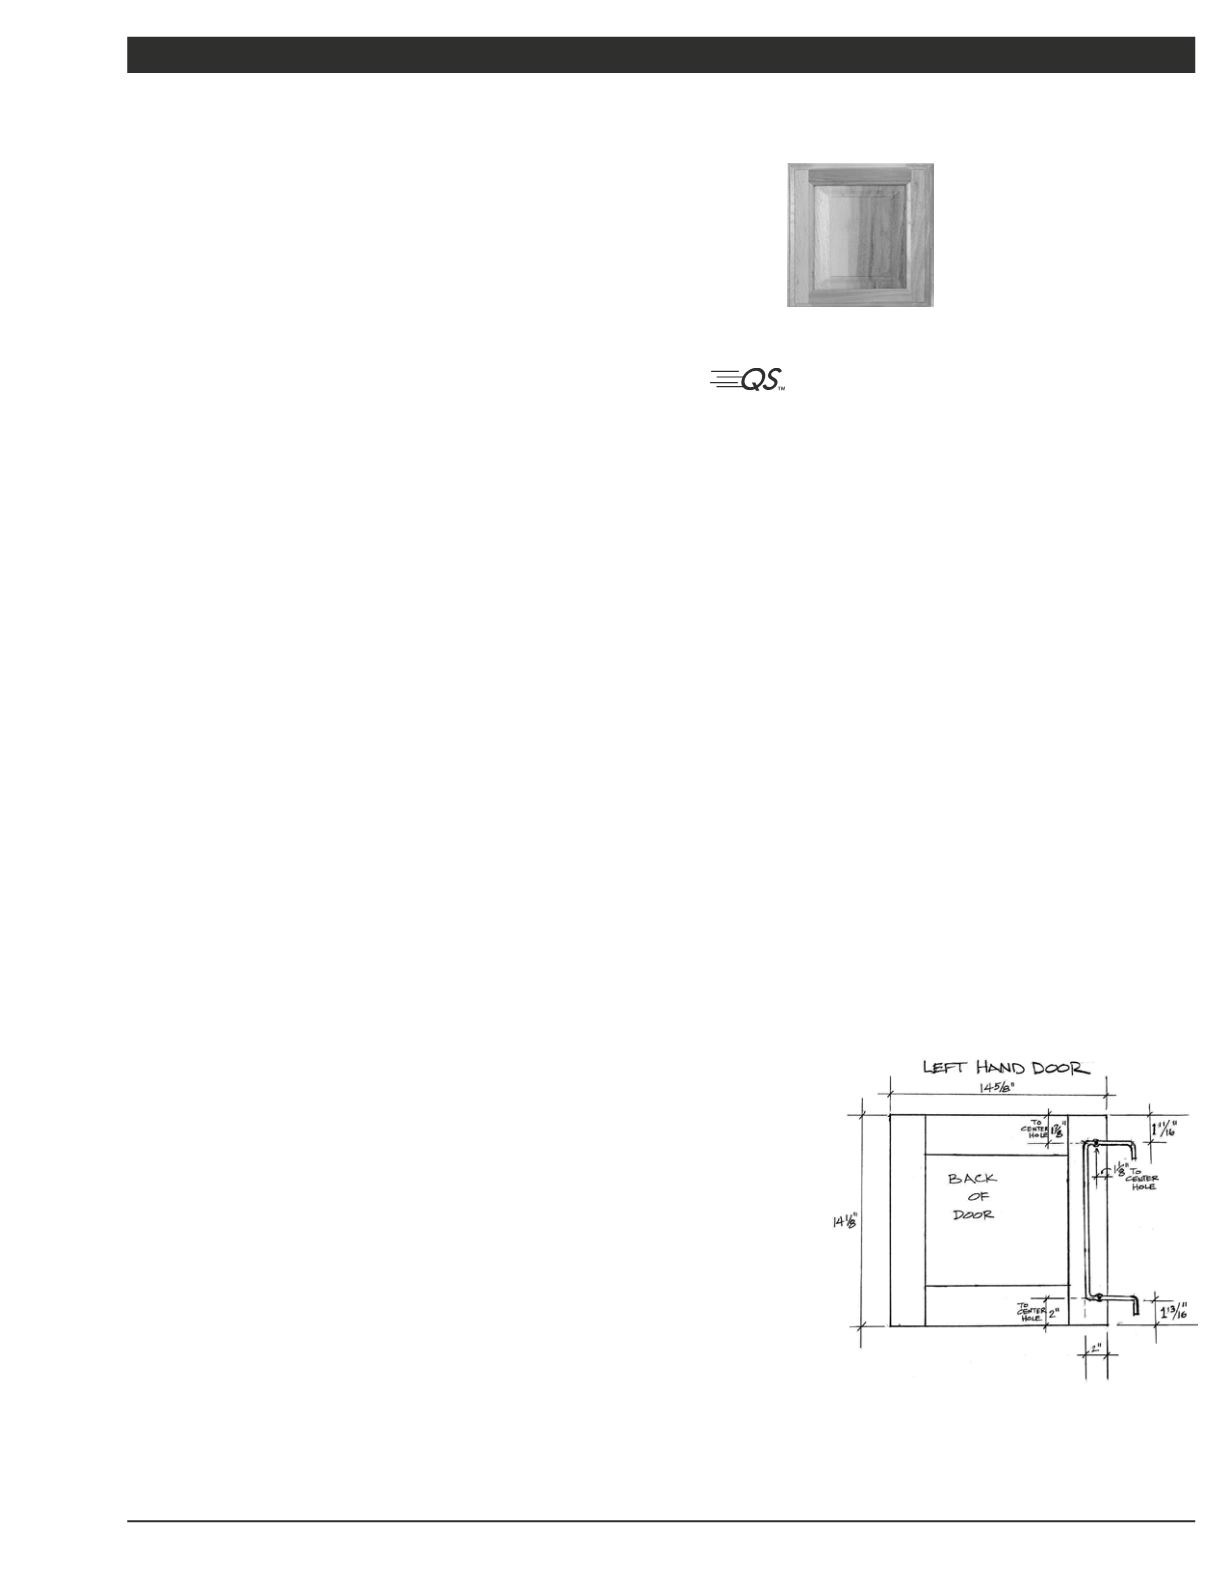
Doors (FD1414DD & IFD1414DD)
1. Place the door face down on a flat, non-marring surface.
2. Position the Door Pivot Hinge on the right side of the door
centered top to bottom. See drawing for dimensions. Mark the
hole locations on the back of the door.
3. Secure Door Pivot Hinge to the door with two #8 x
5
⁄
8
” Pan Head
screws.
4. The hinged door can now be installed in the Wall Mount Display
Unit by inserting the top of the rod into the desired hole location,
push the rod to the top of the hole and let the bottom of the rod
slide into the corresponding hole at the bottom.