


 711 / 878

Premier–8–25
CALCULATING PANELS (continued)
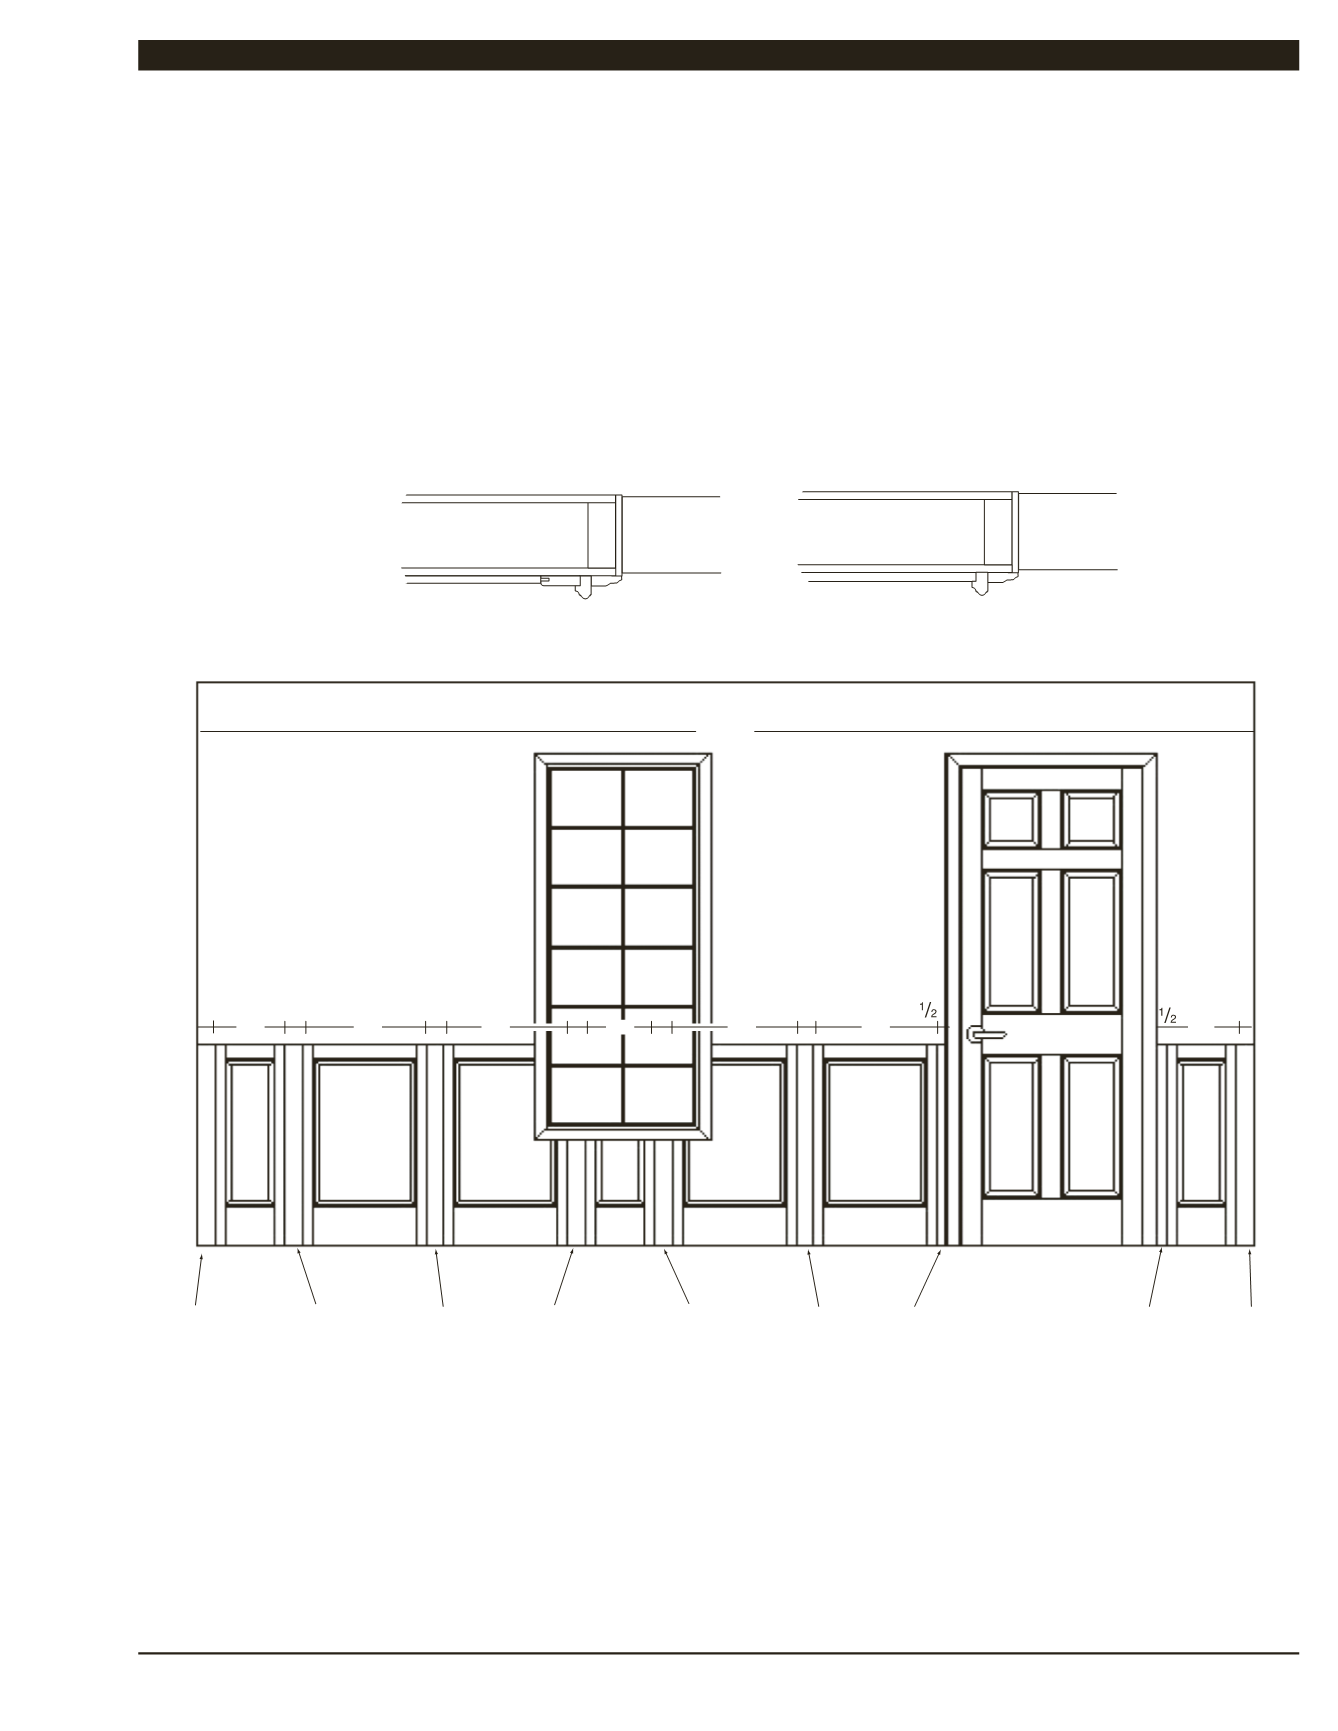
Walls with Windows and Doors
Calculating the panels for the same 180” wall with windows and doors will vary depending on the window and door sizes, treatment and
location. Other design applications can be applied. The example below is just one solution. In the example below the window and door have a
standard 2
1
⁄
4
” casing on four sides with wainscot cap moulding (CAPM8) mitered around them and between the panels and casing.
1. Start with the center of the 3” stile of a 42” panel, the center of a 12” or 21” panel, or the center of a 3” universal filler (as in example
below). Determine the best panel width to amply cover the area under the window. In the example, (1) 12” panel, (2) 21” panels, and 3”
universal fillers are used. These parts are cut square on the top and at 90 degrees on sides as needed to butt into the cap moulding used
to separate the panels from the casing.
2. Continue down the wall to the corner. In the example, the run is finished with a 12” and 21” panel with 3” and 6” universal fillers trimmed
to fit.
3. On the side next to the door, the components are butted into the cap moulding as in the window treatment. Repeat this treatment on
both sides for a consistent fit.
window
door
UF348
(trim)
UF348
(trim)
UF348
(trim)
UF348
(trim)
UF348
(trim)
UF348
(trim)
UF348
(trim)
UF348
(trim)
UF348
(trim)
3''
12''
3''
3''
3''
3''
3''
3''
21''
21''
21''
21''
12''
12''
180''
''
''
Section View of Door
Section View of Window
Sample Installation for Reference Only
Casing
Wainscot Cap
Top Rail
Panel
Casing
Wainscot Cap
Panel
Note: When calculating panel sizes for our wainscot, please remember that the calculation tips shown in this section are examples only. Due
to the various room configurations, it is the dealer’s responsibility to verify that their calculations are correct. Wellborn Cabinet, Inc.,
assumes no responsibility for the accuracy of the dealer’s calculations.